


In this article we will learn how to convert an image (containing a simple form) to an HTML form using Amazon Textract and NodeJS. Amazon Textract is a service that automatically extracts text and data from scanned documents. It’s an AI powered optical character recognition (OCR) that makes it very simple to accurately pull out content from an image.
One of Textract’s strengths is the ability to identify a form in an image and extract the data with its associated relationship. Meaning, if we look at a basic form:

Textract provides an API that enable us to output the results as follows:
{
	"Position": "Software Developer",
	"First Name": "Muhi",
	"Last Name": "Masri",
	"Address": "Planet Earth"
}
Pretty cool, right! But getting the desired JSON object is not as simple as calling one function from Textract’s API and in this article we will look at a simplified solution to achieve this.
This article will assume that you have an AWS account including S3 storage, access key and secret key. If not, you can still continue reading but I highly recommend to create an AWS Account and get a bit familiar with how it works.
Create a simple NodeJS app
We are going to use express application generator. It automatically creates a project with html views (using pug) and a routing system. This way, we can easily add an upload function and post the result in a different view
mkdir aws-textract-app
cd aws-textract-app
npx express-generator --view=pug
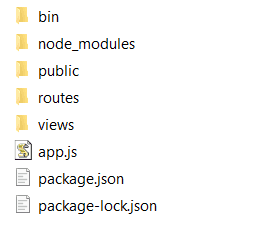
npm installWe simply created a folder and installed express-generator with all the npm dependencies. Here is how your project structure should look like:
Upload an image to your S3 storage:
For simplicity sake, we will use the image we have at the beginning of the article that contains 4 inputs (Position, First Name, Last Name and Address)
First, let’s add all the required elements to upload a file in the index.pug view
extends layout

block content
  h1= title
  p Welcome to #{title}
  form(action="fileupload", method="post", enctype="multipart/form-data")
    input(type="file", name="filetoupload")
    input(type="submit", value="Upload File")
Then let’s create a new fileupload.pug view in the view folder to post the results. Also, we will add a simple form to bind the extracted data later on.
extends layout

block content
  h1= title
  div
    span Position:
    input(type="text", name="position", value=`${formData['Position']}`)
  div
    span First Name:
    input(type="text", name="firstName", value=`${formData['First Name']}`)
  div
    span Last Name:
    input(type="text", name="lastName", value=`${formData['Last Name']}`)
  div
    span Address:
    input(type="text", name="address", value=`${formData['Address']}`)
Now that we have the HTML part done, let’s go ahead and start writing the logic for uploading the file.
Let’s start with installing all the dependencies to intercept a file and upload it to the S3 storage.
npm i formidable
npm i fs
npm i aws-sdk
In the routes folder, you should find an index.js file that already has the following code:
var express = require('express');
var router = express.Router();

/* GET home page. */
router.get('/', function(req, res, next) {
  res.render('index', { title: 'Express' });
});

module.exports = router;
In the same file, we will include all the dependencies we just installed and add a new post router that handles the fileupload post action in index.pug view.
var express = require('express');
var router = express.Router();
const formidable = require('formidable')
const AWS = require('aws-sdk')
const fs = require('fs')

/* GET home page. */
router.get('/', function(req, res, next) {
  res.render('index', { title: 'Express' });
});

router.post('/fileupload', (req, res, next) => {
  // Upload logic
}

module.exports = router;
And then below we will add the implementation for the upload logic:
router.post('/fileupload', (req, res, next) => {
  // Upload logic
  const form = new formidable.IncomingForm()
  form.parse(req, async (err, fields, files) => {
    if (err) {
      console.error(err)
    }
    const fileContent = fs.readFileSync(files.filetoupload.path)
    const s3Params = {
      Bucket: process.env.AWS_BUCKET,
      Key: `${Date.now().toString()}-${files.filetoupload.name}`,
      Body: fileContent,
      ContentType: files.filetoupload.type,
      ACL: 'public-read'
    }
    const s3Content = await s3Upload(s3Params)
    // Textract code will be added here
  })
})

async function s3Upload (params) {
  const s3 = new AWS.S3({
    accessKeyId: process.env.AWS_ACCESS_KEY,
    secretAccessKey: process.env.AWS_SECRET_KEY
  })
  return new Promise(resolve => {
    s3.upload(params, (err, data) => {
      if (err) {
        console.error(err)
        resolve(err)
      } else {
        resolve(data)
      }
    })
  })
}
Quick summary of what we just did:
- Parsed the form using formidable.
- Read the content of the file and assigned it as a value to the
Bodyproperty (along with other required properties) in the AWS upload parameters. - Created an async
s3Uploadfunction that returns the results in the variables3Content. The information in this variable will be used for the Textract reader in the next step.
At this point, you should be able to run the Node app and upload an image directly to your S3 bucket. Awesome job!
Analyse a document directly from S3 bucket using Textract API
Let’s create a function called documentExtract that takes the S3 object key as a parameter and then returns all the data extracted from the image.
async function documentExtract (key) {
  return new Promise(resolve => {
    var textract = new AWS.Textract({
      region: process.env.AWS_REGION,
      endpoint: `https://textract.${process.env.AWS_REGION}.amazonaws.com/`,
      accessKeyId: process.env.AWS_ACCESS_KEY,
      secretAccessKey: process.env.AWS_SECRET_KEY
    })
    var params = {
      Document: {
        S3Object: {
          Bucket: process.env.AWS_BUCKET,
          Name: key
        }
      },
      FeatureTypes: ['FORMS']
    }

    textract.analyzeDocument(params, (err, data) => {
      if (err) {
        return resolve(err)
      } else {
        resolve(data)
      }
    })
  })
}
Similar to the S3 upload process we did earlier, the Textract API will require information about your region, access key, bucket name…
You will notice that we have a property called FeatureTypes and a value FORMS, this is very important as it let Textract do its magic and return Key-Value sets to help us associate input fields with the proper labels (i.e. “Software Developer” belongs to “Position”, “Planet Earth” belongs to “Address” and so on)
Now let’s insert this function right after the S3 upload process and log the results. Our index.js code should look like this so far:
const express = require('express')
const router = express.Router()
const formidable = require('formidable')
const AWS = require('aws-sdk')
const fs = require('fs')

/* GET home page. */
router.get('/', (req, res, next) => {
  res.render('index', { title: 'Textract Uploader' })
})

router.post('/fileupload', (req, res, next) => {
  // Upload logic
  const form = new formidable.IncomingForm()
  form.parse(req, async (err, fields, files) => {
    if (err) {
      console.error(err)
    }
    const fileContent = fs.readFileSync(files.filetoupload.path)
    const s3Params = {
      Bucket: process.env.AWS_BUCKET,
      Key: `${Date.now().toString()}-${files.filetoupload.name}`,
      Body: fileContent,
      ContentType: files.filetoupload.type,
      ACL: 'public-read'
    }
    const s3Content = await s3Upload(s3Params)
    const textractData = await documentExtract(s3Content.Key)
    console.log(textractData)
  })
})

async function s3Upload (params) {
   const s3 = new AWS.S3({
    accessKeyId: process.env.AWS_ACCESS_KEY,
    secretAccessKey: process.env.AWS_SECRET_KEY
  })
  return new Promise(resolve => {
    s3.upload(params, (err, data) => {
      if (err) {
        console.error(err)
        resolve(err)
      } else {
        resolve(data)
      }
    })
  })
}

async function documentExtract (key) {
 return new Promise(resolve => {
    var textract = new AWS.Textract({
      region: process.env.AWS_REGION,
      endpoint: `https://textract.${process.env.AWS_REGION}.amazonaws.com/`,
      accessKeyId: process.env.AWS_ACCESS_KEY,
      secretAccessKey: process.env.AWS_SECRET_KEY
    })
    var params = {
      Document: {
        S3Object: {
          Bucket: process.env.AWS_BUCKET,
          Name: key
        }
      },
      FeatureTypes: ['FORMS']
    }

    textract.analyzeDocument(params, (err, data) => {
      if (err) {
        return resolve(err)
      } else {
        resolve(data)
      }
    })
  })
}

module.exports = router
When running the code, the console will print a list of JSON objects were each object represents a block with a unique id, list of relationships and other related properties. Let’s take this as an example:
{
		"BlockType": "KEY_VALUE_SET",
		"Confidence": 80.23428344726562,
		"Geometry": {
			"BoundingBox": {
				"Width": 0.0715109333395958,
				"Height": 0.043582554906606674,
				"Left": 0.018339848145842552,
				"Top": 0.4098675847053528
			},
			"Polygon": [{
				"X": 0.018339848145842552,
				"Y": 0.4098675847053528
			}, {
				"X": 0.0898507833480835,
				"Y": 0.4098675847053528
			}, {
				"X": 0.0898507833480835,
				"Y": 0.45345014333724976
			}, {
				"X": 0.018339848145842552,
				"Y": 0.45345014333724976
			}]
		},
		"Id": "c3d7521b-0371-4ca1-9607-0864f2edcfdd",
		"Relationships": [{
			"Type": "VALUE",
			"Ids": ["e294a18d-8db3-4369-bec4-e15b882e6563"]
		}, {
			"Type": "CHILD",
			"Ids": ["9eaa014f-03ce-4722-9665-3bd94aea60ec", "8471eed1-9caf-45df-bd6a-e639f6caa9d4"]
		}],
		"EntityTypes": ["KEY"]
	}
Whenever the BlockType is KEY_VALUE_SET, it means that it has a relationship property that connects associated objects together. In this specific block, we can figure the relationship between “Position” and “Software Developer” by looking up the “Ids” in the “Relationships” object. To understand how it works in more details, you can checkout Amazon’s Developers Guide.
Use AWS Textract Helper to extract the form data as a JSON object
To simplify the process of finding all relationships and save you from writing several functions, I created an AWS Textract Helper module to do the job in just one hit.
Let’s install the module and include it in our index.js file
npm i aws-textract-helperconst textractHelper = require('aws-textract-helper')There are multiple functions available in the API but for now you only need createForm. It takes two parameters, the data that we got back from the documentExtract function and a config (optional) which allows you to trim unwanted characters in the form keys such as a colon or an extra space.
const textractData = await documentExtract(s3Content.Key)
const formData = textractHelper.createForm(textractData, { trimChars: [':', ' '] })
Display the results in an HTML form
Last but not least, let’s render the fileupload view with the data generated from the textract helper function. Our final code for the upload function should look like this:
router.post('/fileupload', (req, res, next) => {
  // Upload logic
  const form = new formidable.IncomingForm()
  form.parse(req, async (err, fields, files) => {
    if (err) {
      console.error(err)
    }
    const fileContent = fs.readFileSync(files.filetoupload.path)
    const s3Params = {
      Bucket: process.env.AWS_BUCKET,
      Key: `${Date.now().toString()}-${files.filetoupload.name}`,
      Body: fileContent,
      ContentType: files.filetoupload.type,
      ACL: 'public-read'
    }
    const s3Content = await s3Upload(s3Params)
    const textractData = await documentExtract(s3Content.Key)

    const formData = textractHelper.createForm(textractData, { trimChars: [':', ' '] })
    res.render('fileupload', { title: 'Upload Results', formData })
  })
})
Now when we run the code and upload the image, we should get the following results. Also, the full example is available publicly in this repository.
Conclusion
Amazon Textract is still relatively a new technology and a lot to discover and learn from but it is definitely worth looking at when you want to instantly and accurately analyse unstructured text from your customer’s captured data such as invoices or receipts.
Bye for now 👋


