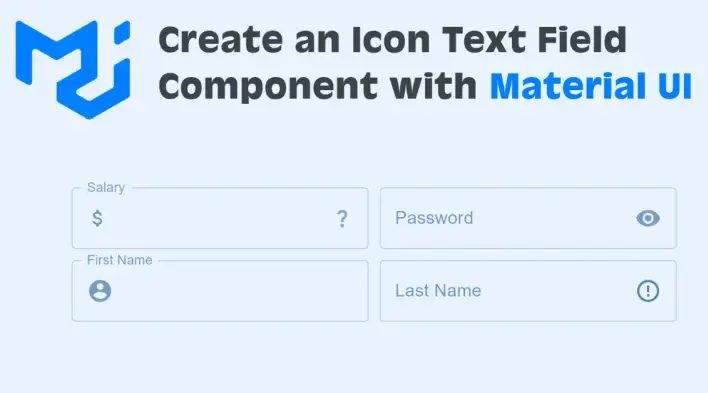
MUI provides an easy way to add icons to a TextField component:
import InputAdornment from '@mui/material/InputAdornment';
import TextField from '@mui/material/TextField';
import AttachMoneyIcon from '@mui/icons-material/AttachMoney';

export default function InputIcon() {
  return (
    <TextField
        id="input-with-icon-textfield"
        label="TextField"
        InputProps={{
          startAdornment: (
            <InputAdornment position="start">
              <AttachMoneyIcon />
            </InputAdornment>
          ),
        }}
        variant="standard"
      />
  );
}
TextField component internally encapsulates FormControl, InputLabel, and Input elements together. That’s why it provides InputProps to pass in other required properties to the Input component. In the above example, we added an icon at the beginning of the TextField.
Although this seems like a simple code to write, it will become redundant as we keep doing it in many places in our project. So it’s much nicer if we can do something like:
<IconTextField
  label="TextField"
  variant="standard"
  iconStart={<AccountCircle />}
/>;
In this tutorial, we will go through a simple guided solution to creating a re-usable IconTextField component. If you’d like to skip all the details, below is the final working code on CodeSandbox:
Install MUI
npm install @mui/material @emotion/react @emotion/styledEmotion library is required to create React components that have styles attached to them.
Create a new component
Let’s create a new IconTextField component that inherits all props from TextField:
import TextField from "@mui/material/TextField";

const IconTextField = (props) => {
  return <TextField {...props} />;
};
That way, when consuming it, we can use any feature that MUI provides:
import TextField from "@mui/material/TextField";

export default function App() {
  return (
    <div className="App">
      <IconTextField label="TextField" variant="standard" />
    </div>
  );
}

const IconTextField = (props) => {
  return <TextField {...props} />;
};
Add icons
The goal here is to avoid having to write the code below every time we need to use icons:
InputProps={{
  startAdornment: (
    <InputAdornment position="start">
      <AttachMoneyIcon />
    </InputAdornment>
  ),
endAdornment: (
    <InputAdornment position="end">
      <QuestionMark />
    </InputAdornment>
  ),
}}
Let’s add two new props - startIcon and endIcon; each will accept any element as a value. Then, in InputProp, we can dynamically add and remove InputAdorment based on the icon value:
const IconTextField = ({ iconStart, iconEnd, ...props }) => {
  return (
    <TextField
      {...props}
      InputProps={{
        startAdornment: iconStart ? (
          <InputAdornment position="start">{iconStart}</InputAdornment>
        ) : null,
        endAdornment: iconEnd ? (
          <InputAdornment position="end">{iconEnd}</InputAdornment>
        ) : null
      }}
    />
  );
};
Now when consuming it, the code will be shorter and simpler to write:
<IconTextField
  label="TextField"
  iconStart={<AttachMoneyIcon />}
  iconEnd={<QuestionMark />}
/>;
One last addition, if we want to enable all other Input props, we need to pass it down explicitly:
const IconTextField = ({ iconStart, iconEnd, InputProps, ...props }) => {
  return (
    <TextField
      {...props}
      InputProps={{
        ...InputProps,
        startAdornment: iconStart ? (
          <InputAdornment position="start">{iconStart}</InputAdornment>
        ) : null,
        endAdornment: iconEnd ? (
          <InputAdornment position="end">{iconEnd}</InputAdornment>
        ) : null
      }}
    />
  );
};
Style Icons
We can style an icon by using sx prop directly in the component:
<IconTextField
  label="TextField"
  iconStart={<AttachMoneyIcon sx={{ color: "green", fontSize: 20 }} />}
  iconEnd={<QuestionMark sx={{ color: "#0089ff", fontSize: 20 }} />}
/>;
Take away
Although MUI provides us with excellent features encapsulated with easy-to-use components, we can still further refine and customize elements to make development more productive and fun!
Bye for now 👋


