


Exporting data to Excel or CSV using the browser can sometimes be challenging, especially when creating a link element and mimicking a download click.
In this tutorial, we will learn a simple approach to exporting an HTML table to Excel and CSV files using a couple of handy libraries.
Initialize Project
The project will be vanilla Javascript using Vite as a build tool.
Let’s create a new folder called “export-html-table”, navigate to it and run the following command to create a new package.json file:
npm initA package.json file will be generated. Let’s replace it with the following:
{
  "name": "export-html-table",
  "version": "1.0.0",
  "scripts": {
    "dev": "vite"
  },
  "dependencies": {
    "file-saver": "2.0.5",
    "xlsx": "^0.18.5"
  },
  "devDependencies": {
    "vite": "^5.0.2"
  }
}
We added the dependencies for the project and configured the dev to use Vite.
Here are more details about the dependencies we added:
- Vite: A fast build tool that significantly improves the frontend development experience.
- file-saver: an excellent tool for saving files on the client side, especially if we generate a Blob object dynamically.
- xlsx: A library for reading and writing Excel files.
Let’s install the dependencies by running the following command:
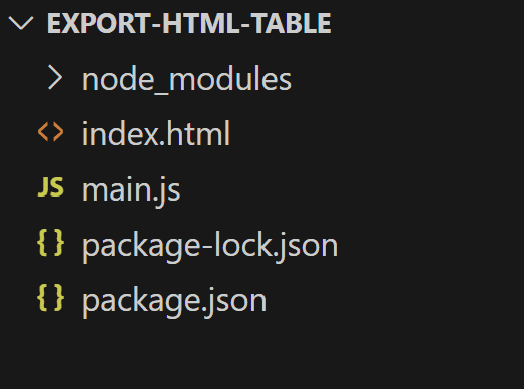
npm installLastly, we will add an index.html file and a main.js file.
Here is how the project structure should look so far:
Export HTML Table to CSV File
To export an HTML table to a CSV file, we need to read all the content of the cells and convert them to CSV format.
Let’s create a new function called exportTable in the main.js file and add the following code.
import { saveAs } from "file-saver"

export const exportTable = () => {
  const rows = document.querySelectorAll("table tr")
  let csv = []
  for (const row of rows) {
    const cells = row.querySelectorAll("td, th")
    const rowText = Array.from(cells).map(cell => cell.innerText)
    csv.push(rowText.join(","))
  }
  const csvFile = new Blob([csv.join("\n")], {
    type: "text/csv;charset=utf-8;",
  })
  saveAs(csvFile, "data.csv")
}
Here are more details of the code above:
- Get and loop through all the rows in the
tableelement - Within the loop, we are getting all the row’s cells and mapping them to a new
rowTextarray with theinnerTextvalue rowTextis then converted to a text separated with a comma and pushed into thecsvarray (a list of all the final CSV rows)- Finally, we are creating a
Blobfile and triggering thesaveAsfunction that downloads the CSV file
In the HTML file, we will add a basic table with some styles and a button to trigger the export function.
<!DOCTYPE html>
<html>
  <style>
    table {
      text-align: left;
      border-spacing: 0;
    }
    table th,
    td {
      border: 1px solid #ccc;
    }
  </style>
  <body>
    <button id="csvButton">Export to CSV</button>
    <table>
      <tr>
        <th>Name</th>
        <th>Position</th>
        <th>Experience</th>
      </tr>
      <tr>
        <td>John Smith</td>
        <td>Marketing</td>
        <td>5 Years</td>
      </tr>
      <tr>
        <td>Adam Kenneth</td>
        <td>Development</td>
        <td>3 Years</td>
      </tr>
      <tr>
        <td>Julia Williams</td>
        <td>HR</td>
        <td>12 Years</td>
      </tr>
    </table>
  </body>
  <script type="module">
    import { exportTable } from "./main.js"
    document
      .querySelector("#csvButton")
      .addEventListener("click", () => exportTable("csv"))
  </script>
</html>
Additionally, we are importing the exportTable function from the main.js file and adding a click event listener to the button to trigger the export function.
At this point, we can run the project using the following command:
npm run devAnd now we should be able to export the table to a CSV file.
Export HTML Table to Excel File
Exporting to an Excel file requires an additional library called “xlsx”, which we installed earlier. Let’s import it in the main.js file and update the exportTable function to support an Excel file.
import { saveAs } from "file-saver"
import * as XLSX from "xlsx"

export const exportTable = format => {
  const table = document.querySelector("table")
  const rows = document.querySelectorAll("table tr")

  if (format === "csv") {
    let csv = []
    for (const row of rows) {
      const cells = row.querySelectorAll("td, th")
      const rowText = Array.from(cells).map(cell => cell.innerText)
      csv.push(rowText.join(","))
    }
    const csvFile = new Blob([csv.join("\n")], {
      type: "text/csv;charset=utf-8;",
    })
    saveAs(csvFile, "data.csv")
  } else if (format === "excel") {
    const workbook = XLSX.utils.table_to_book(table)
    const options = { bookType: "xlsx", bookSST: false, type: "array" }
    const output = XLSX.write(workbook, options)
    saveAs(
      new Blob([output], { type: "application/octet-stream" }),
      "data.xlsx"
    )
  } else {
    throw new Error("Unsupported format")
  }
}
In the code above, we check if the format is csv or excel and execute the appropriate code. For the Excel file, we use the table_to_book function to convert the table to a workbook and then the write function to convert the workbook to an Excel file.
Now, we can update the HTML file to support the Excel export.
<!DOCTYPE html>
<html>
    <style>
        table {
            text-align: left;
            border-spacing: 0;
        }
        table th, td {
            border: 1px solid #ccc;
        }
    </style>
    <body>
        <button id="csvButton">Export to CSV</button>
        <button id="excelButton">Export to Excel</button>
        <table>
            <tr>
                <th>Name</th>
                <th>Position</th>
                <th>Experience</th>
            </tr>
            <tr>
                <td>John Smith</td>
                <td>Marketing</td>
                <td>5 Years</td>
            </tr>
            <tr>
                <td>Adam Kenneth</td>
                <td>Development</td>
                <td>3 Years</td>
            </tr>
            <tr>
                <td>Julia Williams</td>
                <td>HR</td>
                <td>12 Years</td>
            </tr>
        </table>
    </body>
    <script type="module">
        import { exportTable } from './main.js';
        document
          .querySelector('#csvButton')
          .addEventListener('click', () => exportTable('csv'));

        document
          .querySelector('#excelButton')
          .addEventListener('click', () => exportTable('excel'));
    </script>
</html>
And that’s it! We can now export the table to an Excel file.
Summary
In this tutorial, we learned how to export an HTML table to CSV and Excel with one function that accepts a format parameter. The project is configured with Vite and has two dependencies: file-saver and xlsx, but it’s using vanilla Javascript and doesn’t require any additional frameworks like React or Vue.
The complete code is available in this repository.
Bye for now 👋


