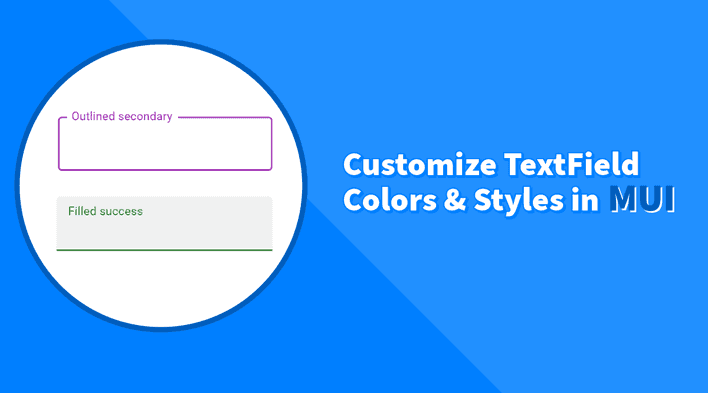
Customizing TextField colors is an essential part of building a beautiful UI. MUI TextField component is not just an input field, but it’s a wrapper that contains multiple elements like the label, input, text helper, error and more. That’s why styling it is a bit different than a regular input field. In this tutorial, we will learn how to customize the colors of the TextField component in Material UI (MUI) and React including the border, label, and text colors for different variants.
The classes that we will use to customize the TextField styles and colors are based on the variant prop. So to find the class we need, we will have to choose the variant first. Let’s go through the different variants and see how we can customize the colors and styles for each one.
Outlined Variant
The outlined variant is the default variant for the TextField component. It has a border around the input field and a label that floats above the input when the user starts typing. To customize the colors of the TextField with the outlined variant, there are three main classes that we can use:
MuiOutlinedInput-root: The root class for the input field.MuiInputLabel-outlined: The class for the label.MuiOutlinedInput-notchedOutline: The class for the border.
In the following example, we’re going to override the default colors and styles using the sx prop.
Outlined Custom Styles
import React from "react";
import TextField from "@mui/material/TextField";

export default function OutlinedTextField() {
  return (
    <TextField
      label="Outlined"
      variant="outlined"
      sx={{
        // Root class for the input field
        "& .MuiOutlinedInput-root": {
          color: "#000",
          fontFamily: "Arial",
          fontWeight: "bold",
          // Class for the border around the input field
          "& .MuiOutlinedInput-notchedOutline": {
            borderColor: "#2e2e2e",
            borderWidth: "2px",
          },
        },
        // Class for the label of the input field
        "& .MuiInputLabel-outlined": {
          color: "#2e2e2e",
          fontWeight: "bold",
        },
      }}
    />
  );
}
Outlined Focused State
Although we can see the styles reflected properly in the example above, when focusing on the input field, the changes are not applied. The focused state has it’s own colors and styles and they are directly related to the theme colors. Meaning, if we use the color prop and set it to secondary, we will see the colors of the focused state changes.
...

export default function OutlinedTextField() {
  return (
    <TextField
      label="Outlined"
      variant="outlined"
      color="secondary"
      sx={{
       ...
      }}
    />
  );
}
While it’s correct that the focused state should have different colors (like the primary or secondary color of the theme), we need to apply the other styles to the focused state as well. To do that, we can use the &.Mui-focused class to target the focused state and apply the styles we need.
...

export default function OutlinedTextField() {
  return (
    <TextField
      label="Outlined"
      variant="outlined"
      color="secondary"
      sx={{
        "& .MuiOutlinedInput-root": {
          color: "#000",
          fontFamily: "Arial",
          fontWeight: "bold",
          "& .MuiOutlinedInput-notchedOutline": {
            borderColor: "#2e2e2e",
            borderWidth: "2px",
          },
          "&.Mui-focused": {
            "& .MuiOutlinedInput-notchedOutline": {
              borderColor: "secondary.main",
              borderWidth: "3px",
            },
          },
          "& .MuiInputLabel-outlined": {
            color: "#2e2e2e",
            fontWeight: "bold",
            "&.Mui-focused": {
              color: "secondary.main",
              fontWeight: "bold",
            },
          },
        },
      }}
    />
  );
}
The Mui-focused class is at the root level and that’s why the MuiOutlinedInput-notchedOutline class is nested inside it. Now, when focused, the label, border color and width will change.
Outlined Hover State
After applying the new styles, the default hover state can be effected. We can use the &:hover class to apply the styles we need for the hover state.
...

export default function OutlinedTextField() {
  return (
    <TextField
      label="Outlined"
      variant="outlined"
      color="secondary"
      sx={{
        "& .MuiOutlinedInput-root": {
          color: "#000",
          fontFamily: "Arial",
          fontWeight: "bold",
          "& .MuiOutlinedInput-notchedOutline": {
            borderColor: "#2e2e2e",
            borderWidth: "2px",
          },
          "&.Mui-focused": {
            "& .MuiOutlinedInput-notchedOutline": {
              borderColor: "secondary.main",
              borderWidth: "3px",
            },
          },
          "&:hover:not(.Mui-focused)": {
            "& .MuiOutlinedInput-notchedOutline": {
              borderColor: "#ccc",
            },
          },
        },
        "& .MuiInputLabel-outlined": {
          color: "#2e2e2e",
          fontWeight: "bold",
          "&.Mui-focused": {
            color: "secondary.main",
            fontWeight: "bold",
          },
        },
      }}
    />
  );
}
We also added :not(.Mui-focused) to the hover state to make sure the hover state is not applied when the input is focused.
Filled Variant
The filled variant has a background color, a bottom border and a label that floats within the input when the user starts typing. To customize the colors and styles, there are two main classes that we can use:
MuiFilledInput-root: The root class for the input field.MuiInputLabel-filled: The class for the label.
Filled Custom Styles
In the following example, we’re going to override the default colors and styles using the sx prop:
import React from "react";
import TextField from "@mui/material/TextField";

export default function FilledTextField() {
  return (
    <TextField
      label="Filled"
      variant="filled"
      sx={{
        // Root class for the input field
        "& .MuiFilledInput-root": {
          color: "#000",
          fontFamily: "Arial",
          fontWeight: "bold",
          backgroundColor: "#f4f4f4",
          borderTopLeftRadius: "7px",
          borderTopRightRadius: "7px",
        },
        // Class for the label of the filled input field
        "& .MuiInputLabel-filled": {
          color: "#2e2e2e",
          fontWeight: "bold",
        },
      }}
    />
  );
}
As seen in the code above, using the MuiFilledInput-root class, we can change the background color, border radius and other styles. The MuiInputLabel-filled class is used to change the label styles.
The bottom border is styled separatly as it’s created using the &:before pseudo-element which we can use to change the border color and width.
...

export default function FilledTextField() {
  return (
    <TextField
      label="Filled"
      variant="filled"
      color="secondary"
      sx={{
        "& .MuiFilledInput-root": {
          color: "#000",
          fontFamily: "Arial",
          fontWeight: "bold",
          backgroundColor: "#f4f4f4",
          borderTopLeftRadius: "7px",
          borderTopRightRadius: "7px",
          "&:before": {
            borderColor: "#2e2e2e",
            borderWidth: "2px",
          },
        },
        "& .MuiInputLabel-filled": {
          color: "#2e2e2e",
          fontWeight: "bold",
        },
      }}
    />
  );
}
Filled Focused State
For the focused state, we can use the &.Mui-focused class to target the focused state of the label but the bottom border is also another pseudo-element created using the &:after class in the root class.
In the following example, we’re going to override the default colors and styles for the focused state:
...

export default function FilledTextField() {
  return (
    <TextField
      label="Filled"
      variant="filled"
      color="secondary"
      sx={{
        "& .MuiFilledInput-root": {
          color: "#000",
          fontFamily: "Arial",
          fontWeight: "bold",
          backgroundColor: "#f4f4f4",
          borderTopLeftRadius: "7px",
          borderTopRightRadius: "7px",
          "&:before": {
            borderColor: "#2e2e2e",
            borderWidth: "2px",
          },
          "&:after": {
            borderColor: "secondary.main",
            borderWidth: "3px",
          },
        },
        "& .MuiInputLabel-filled": {
          color: "#2e2e2e",
          fontWeight: "bold",
          "&.Mui-focused": {
            color: "secondary.main",
            fontWeight: "bold",
          },
        },
      }}
    />
  );
}
Filled Hover State
Let’s chnage the background color and the bottom border when hovering over the input field using the &:hover class. Also, we need to make sure the hover state is not applied when the input is focused.
...

export default function FilledTextField() {
  return (
    <TextField
      label="Outlined"
      variant="outlined"
      color="secondary"
      sx={{
        "& .MuiOutlinedInput-root": {
          color: "#000",
          fontFamily: "Arial",
          fontWeight: "bold",
          "& .MuiOutlinedInput-notchedOutline": {
            borderColor: "#2e2e2e",
            borderWidth: "2px",
          },
          "&.Mui-focused": {
            "& .MuiOutlinedInput-notchedOutline": {
              borderColor: "secondary.main",
              borderWidth: "3px",
            },
          },
          "&:hover:not(.Mui-focused)": {
            "& .MuiOutlinedInput-notchedOutline": {
              borderColor: "#ccc",
            },
          },
        },
        "& .MuiInputLabel-outlined": {
          color: "#2e2e2e",
          fontWeight: "bold",
          "&.Mui-focused": {
            color: "secondary.main",
            fontWeight: "bold",
          },
        },
      }}
    />
  );
}
Standard Variant
The standard variant is the most basic variant of the TextField component. It has a bottom border and a label that floats above the input when the user starts typing. To customize the colors and styles, there are two main classes that we can use:
MuiInput-root: The root class for the input field.MuiInputLabel-standard: The class for the label.
Standard Custom Styles
In the following example, we’re going to override the default colors and styles using the sx prop:
import React from "react";
import TextField from "@mui/material/TextField";

export default function StandardTextField() {
  return (
    <TextField
      label="Standard"
      variant="standard"
      sx={{
        "& .MuiInput-root": {
          color: "#000",
          fontFamily: "Arial",
          fontWeight: "bold",
          // Bottom border
          "&:before": {
            borderColor: "#2e2e2e",
            borderWidth: "2px",
          },
        },
        // Label
        "& .MuiInputLabel-standard": {
          color: "#2e2e2e",
          fontWeight: "bold",
        },
      }}
    />
  );
}
For the focused and hover states, we will follow the same steps as the filled variant.
Standard Focused State
- Use the
&.Mui-focusedclass to target the focused state of the label - Use the
:afterpseudo-element to target the focused state of the bottom border
...

export default function StandardTextField() {
  return (
    <TextField
      label="Standard"
      variant="standard"
      color="secondary"
      sx={{
        "& .MuiInput-root": {
          color: "#000",
          fontFamily: "Arial",
          fontWeight: "bold",
          // Bottom border
          "&:before": {
            borderColor: "#2e2e2e",
            borderWidth: "2px",
          },
          // Border on focus
          "&:after": {
            borderColor: "secondary.main",
            borderWidth: "3px",
          },
        },
        // Label
        "& .MuiInputLabel-standard": {
          color: "#2e2e2e",
          fontWeight: "bold",
          "&.Mui-focused": {
            color: "secondary.main",
          },
        },
      }}
    />
  );
}
Standard Hover State
- Use the
&:hoverselector to target the hover state of the input field - Exclude the hover state when the input is focused using
:not(.Mui-focused)
...

export default function StandardTextField() {
  return (
    <TextField
      label="Standard"
      variant="standard"
      color="secondary"
      sx={{
        "& .MuiInput-root": {
          color: "#000",
          fontFamily: "Arial",
          fontWeight: "bold",
          // Bottom border
          "&:before": {
            borderColor: "#2e2e2e",
            borderWidth: "2px",
          },
          // Border on focus
          "&:after": {
            borderColor: "secondary.main",
            borderWidth: "3px",
          },
          ":hover:not(.Mui-focused)": {
            "&:before": {
              borderColor: "#e7e7e7",
              borderWidth: "2px",
            },
          },
        },
        // Label
        "& .MuiInputLabel-standard": {
          color: "#2e2e2e",
          fontWeight: "bold",
          "&.Mui-focused": {
            color: "secondary.main",
          },
        },
      }}
    />
  );
}
Using the Theme
In the examples above, we used the sx prop to override the default colors and styles of the TextField component. Although this is convenient and easy to use, it won’t be the best appraoch as we want to reuse the same styles multiple times across the app. Instead, we can use the theme object to apply the styles globally.
To do that, we can use the createTheme function to create a new theme and then use the ThemeProvider to wrap the app and apply the new theme.
Let’s add styles of all the variants we did to the new theme:
import React from "react";
import TextField from "@mui/material/TextField";
import { ThemeProvider, createTheme } from "@mui/material";

const theme = createTheme({
  components: {
    MuiTextField: {
      styleOverrides: {
        root: {
          // Outlined
          "& .MuiOutlinedInput-root": {
            color: "#000",
            fontFamily: "Arial",
            fontWeight: "bold",
            "& .MuiOutlinedInput-notchedOutline": {
              borderColor: "#2e2e2e",
              borderWidth: "2px",
            },
            "&.Mui-focused": {
              "& .MuiOutlinedInput-notchedOutline": {
                borderColor: "secondary.main",
                borderWidth: "3px",
              },
            },
            "&:hover:not(.Mui-focused)": {
              "& .MuiOutlinedInput-notchedOutline": {
                borderColor: "#ccc",
              },
            },
          },
          "& .MuiInputLabel-outlined": {
            color: "#2e2e2e",
            fontWeight: "bold",
            "&.Mui-focused": {
              color: "secondary.main",
            },
          },
          // Filled
          "& .MuiFilledInput-root": {
            color: "#000",
            fontFamily: "Arial",
            fontWeight: "bold",
            backgroundColor: "#e7e7e7",
            borderTopLeftRadius: "7px",
            borderTopRightRadius: "7px",
            "&:before": {
              borderColor: "#2e2e2e",
              borderWidth: "2px",
            },
            "&:after": {
              borderColor: "secondary.main",
              borderWidth: "3px",
            },
            ":hover:not(.Mui-focused)": {
              "&:before": {
                borderColor: "#e7e7e7",
                borderWidth: "2px",
              },
              backgroundColor: "#f4f4f4",
            },
          },
          "& .MuiInputLabel-filled": {
            color: "#2e2e2e",
            fontWeight: "bold",
            "&.Mui-focused": {
              color: "secondary.main",
            },
          },
          // Standard
          "& .MuiInput-root": {
            color: "#000",
            fontFamily: "Arial",
            fontWeight: "bold",
            "&:before": {
              borderColor: "#2e2e2e",
              borderWidth: "2px",
            },
            "&:after": {
              borderColor: "secondary.main",
              borderWidth: "3px",
            },
            ":hover:not(.Mui-focused)": {
              "&:before": {
                borderColor: "#e7e7e7",
                borderWidth: "2px",
              },
            },
          },
        },
      },
    },
  },
});

export default function CustomThemeTextField() {
  return (
    <ThemeProvider theme={theme}>
      <TextField label="Outlined" variant="outlined" color="secondary" />
      <TextField label="Filled" variant="filled" color="secondary" />
      <TextField label="Standard" variant="standard" color="secondary" />
    </ThemeProvider>
  );
}
Now, when consuming the TextField component anywhere in the application, the custom styles will be applied.
Conclusion
In this tutorial, we learned how to customize the colors and styles of the TextField component in Material UI (MUI) and React. We went through the different variants and saw how to change the border, label, and text colors for each one. We also learned how to apply the styles globally using the theme object.
Bye for now 👋


