Tabs are a commonly used layout approach to display different pieces of information on the same screen. Users can quickly switch between different content sections without leaving the current page.
Vertical tabs offer a powerful design approach for creating side menus. They are practical in layouts where you want to keep the primary navigation on the side, efficiently using horizontal space.
In this tutorial, we will learn how to create vertical tabs in React and Material UI. MUI provides a robust set of components and styling options that make the implementation of vertical tabs straightforward and highly customizable.
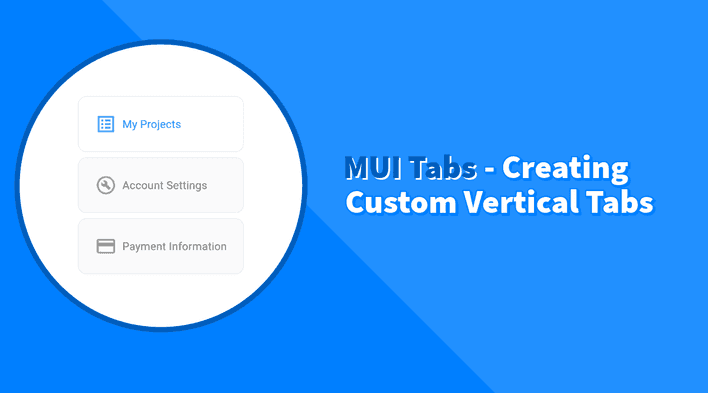
Here’s a preview of what the final implementation will look like:
Creating Basic Vertical Tabs
Let’s start with importing and using the necessary components from MUI:
Setting Up MUI Tabs
import React from "react";
import { Box, Tabs, Tab } from "@mui/material";

export default function VerticalTabs() {
  return (
    <Box>
      <Tabs>
        <Tab label="Item One" />
        <Tab label="Item Two" />
        <Tab label="Item Three" />
      </Tabs>
      <Box>Item One</Box>
      <Box>Item Two</Box>
      <Box>Item Three</Box>
    </Box>
  );
}
The Tabs component wraps each Tab component, and each Tab content is placed inside a Box component.
To make the tabs functional, we need to handle the change event and update the selected tab index:
import React from "react";
import { Box, Tabs, Tab } from "@mui/material";

export default function VerticalTabs() {
  const [value, setValue] = React.useState(0);

  return (
    <Box>
      <Tabs value={value} onChange={(_event, newValue) => setValue(newValue)}>
        <Tab label="Item One" />
        <Tab label="Item Two" />
        <Tab label="Item Three" />
      </Tabs>
      <TabPanel value={value} index={0}>
        Item One
      </TabPanel>
      <TabPanel value={value} index={1}>
        Item Two
      </TabPanel>
      <TabPanel value={value} index={2}>
        Item Three
      </TabPanel>
    </Box>
  );
}

const TabPanel = ({ children, value, index }) => {
  return value === index && <Box>{children}</Box>;
};
In the above code, we have added the value state to keep track of the selected tab index. The onChange event handler updates this state when a tab is clicked. We also created a TabPanel component to render the content conditionally based on the selected index.
Enable Vertical Tabs
To make the tabs vertical, we can pass the orientation prop to the Tabs component:
...
<Tabs
  value={value}
  onChange={(_event, newValue) => setValue(newValue)}
  orientation="vertical"
>
  <Tab label="Item One" />
  <Tab label="Item Two" />
  <Tab label="Item Three" />
</Tabs>
 ...
The current code will only change the orientation of the tabs, but the content will still be displayed below the tabs. To align the content properly, we can use the Stack component from MUI:
import React from "react";
import { Box, Stack, Tabs, Tab } from "@mui/material";

export default function VerticalTabs() {
  const [value, setValue] = React.useState(0);

  return (
    <Stack direction="row" gap={2}>
      <Tabs
        orientation="vertical"
        value={value}
        onChange={(_event, newValue) => setValue(newValue)}
      >
        <Tab label="Item One" />
        <Tab label="Item Two" />
        <Tab label="Item Three" />
      </Tabs>
      <TabPanel value={value} index={0}>
        Item One
      </TabPanel>
      <TabPanel value={value} index={1}>
        Item Two
      </TabPanel>
      <TabPanel value={value} index={2}>
        Item Three
      </TabPanel>
    </Stack>
  );
}

const TabPanel = ({ children, value, index }) => {
  return value === index && <Box>{children}</Box>;
};
Finally, to simplify creating new tabs, we can define a JSON object containing all the tabs and their contents, then loop through this object to populate the elements:
import React from "react";
import { Box, Stack, Tabs, Tab } from "@mui/material";

const tabData = [
  { label: "Item One", content: "Content for Item One" },
  { label: "Item Two", content: "Content for Item Two" },
  { label: "Item Three", content: "Content for Item Three" },
];

export default function VerticalTabs() {
  const [value, setValue] = React.useState(0);

  return (
    <Stack direction="row" gap={2}>
      <Tabs
        orientation="vertical"
        value={value}
        onChange={(_event, newValue) => setValue(newValue)}
      >
        {tabData.map((tab, index) => (
          <Tab key={index} label={tab.label} />
        ))}
      </Tabs>
      {tabData.map((tab, index) => (
        <TabPanel key={index} value={value} index={index}>
          {tab.content}
        </TabPanel>
      ))}
    </Stack>
  );
}

const TabPanel = ({ children, value, index }) => {
  return value === index && <Box>{children}</Box>;
};
Advanced Customization
In this section, we’ll transform the basic vertical tabs into a practical example showcasing their true capabilities. We aim to make the tabs look and behave like menu elements with icons and additional customizations.
Enhancing Tab Labels with Icons
First, let’s replace the tab label content with a Stack component to host the label text and an icon. Since we generate the tabs dynamically, we can include the required icons in the tabData array:
...

const tabData = [
  {
    label: 'My Projects',
    content: 'My Projects',
    icon: <ListAltOutlinedIcon />,
  },
  {
    label: 'Account Settings',
    content: 'Account Settings',
    icon: <BuildCircleOutlinedIcon />,
  },
  {
    label: 'Payment Information',
    content: 'Payment Information',
    icon: <PaymentOutlinedIcon />,
  },
];

...
// Inside the Tabs component
<Tab
  key={index}
  label={
    <Stack direction="row" alignItems="center" gap={1}>
      {tab.icon}
      <Box>
        <Typography whiteSpace="nowrap">{tab.label}</Typography>
      </Box>
    </Stack>
  }
/>

...
Styling the Tabs
Next, we can create a StyledTab component to add some aesthetic look and feel to the tabs:
import { styled } from "@mui/material/styles";
import { grey, blue } from "@mui/material/colors";
import Tab from "@mui/material/Tab";

const StyledTab = styled(Tab)(({ theme }) => ({
  alignItems: "flex-start",
  border: "1px solid",
  borderColor: grey[300],
  textTransform: "none",
  backgroundColor: grey[50],
  borderRadius: "12px",
  padding: "24px",
  transition: "all 0.2s ease-in-out",
  "& p": {
    color: grey[600],
  },
  "& svg": {
    fontSize: 30,
    color: grey[500],
  },
  "&.Mui-selected, &:hover": {
    backgroundColor: "#fff",
    boxShadow: theme.shadows[3],
    "& p": {
      color: blue[500],
    },
    "& svg": {
      color: blue[400],
    },
  },
}));
In this code:
- We use the
styledfunction from MUI to create a customStyledTabcomponent. - Include styles for the tab’s background, border, padding, and transitions.
- The
& pand& svgselectors target the text and icon inside the tab, respectively. - The
&.Mui-selected,&:hoverselector styles the tab when it’s selected or hovered over.
Customizing the TabPanel
Finally, we can make the TabPanel a Paper component to give it a proper section look:
import Paper from "@mui/material/Paper";

const TabPanel = ({ children, value, index }) => {
  return (
    value === index && (
      <Paper elevation={3} sx={{ p: 3, width: "60%", borderRadius: "12px" }}>
        {children}
      </Paper>
    )
  );
};
Putting It All Together
Let’s combine all the pieces and look at the final result:
import React from "react";
import {
  Box,
  Stack,
  Tabs,
  Tab,
  Typography,
  Paper,
  styled,
} from "@mui/material";
import { blue, grey } from "@mui/material/colors";
import BuildCircleOutlinedIcon from "@mui/icons-material/BuildCircleOutlined";
import ListAltOutlinedIcon from "@mui/icons-material/ListAltOutlined";
import PaymentOutlinedIcon from "@mui/icons-material/PaymentOutlined";

const tabData = [
  {
    label: "My Projects",
    content: "My Projects",
    icon: <ListAltOutlinedIcon />,
  },
  {
    label: "Account Settings",
    content: "Account Settings",
    icon: <BuildCircleOutlinedIcon />,
  },
  {
    label: "Payment Information",
    content: "Payment Information",
    icon: <PaymentOutlinedIcon />,
  },
];

export default function CustomThemeTextField() {
  const [value, setValue] = React.useState(0);

  return (
    <Stack direction="row" gap={2} height="265px">
      <Tabs
        orientation="vertical"
        indicatorColor="white"
        value={value}
        onChange={(_event, newValue) => setValue(newValue)}
        sx={{
          "& .MuiTabs-flexContainer": {
            gap: 1,
          },
        }}
      >
        {tabData.map((tab, index) => (
          <StyledTab
            key={index}
            label={
              <Stack direction="row" alignItems="center" gap={1}>
                {tab.icon}
                <Box>
                  <Typography whiteSpace="nowrap">{tab.label}</Typography>
                </Box>
              </Stack>
            }
          />
        ))}
      </Tabs>
      {tabData.map((tab, index) => (
        <TabPanel key={index} value={value} index={index}>
          {tab.content}
        </TabPanel>
      ))}
    </Stack>
  );
}

const StyledTab = styled(Tab)(({ theme }) => ({
  alignItems: "flex-start",
  border: "1px solid",
  borderColor: grey[300],
  textTransform: "none",
  backgroundColor: grey[50],
  borderRadius: "12px",
  padding: "24px",
  transition: "all 0.2s ease-in-out",
  "& p": {
    color: grey[600],
  },
  "& svg": {
    fontSize: 30,
    color: grey[500],
  },
  "&.Mui-selected, &:hover": {
    backgroundColor: "#fff",
    boxShadow: theme.shadows[3],
    "& p": {
      color: blue[500],
    },
    "& svg": {
      color: blue[400],
    },
  },
}));

const TabPanel = ({ children, value, index }) => {
  return (
    value === index && (
      <Paper elevation={3} sx={{ p: 3, width: "60%", borderRadius: "12px" }}>
        {children}
      </Paper>
    )
  );
};
Summary
In this tutorial, we learned how to create vertical tabs in React using MUI. We started with the basic implementation of vertical tabs and then enhanced them with icons, custom styles, and additional features. By leveraging MUI’s powerful components and styling options, we created a practical and visually appealing vertical tabs layout.
Bye for now 👋


