


In the previous part, we did a deep dive into editing a table and creating a dynamic schema to generate different form elements for the user input such as text, number, date…
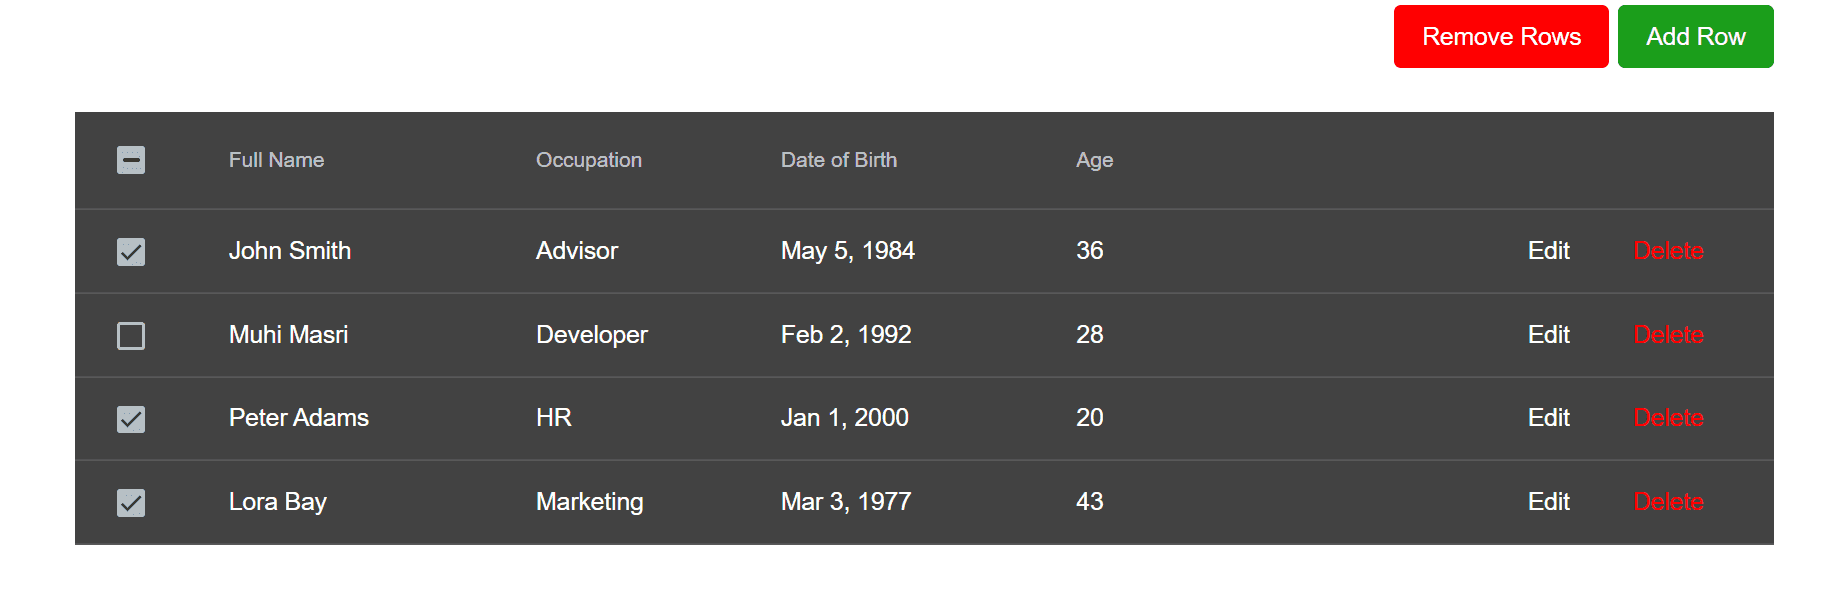
In this part, we will go through the required steps to add and remove multiple rows with a confirmation dialog. The final results will look as follows:
As we continue building upon the same code from previous parts in this series, it’s recommended that you go through these tutorials from the beginning to understand how the code structure works as we will not be explaining it. You can navigate to any part using the table of contents.
Before we begin, the complete repository is accessible here and a working example is available below:
Add a new row
Adding a new row is as simple as inserting a new object to the dataSource array.
A quick recap from the previous tutorial, dataSource is the primary data list used in the table element. We assign it directly to the USER_DATA array, which is just static dummy data. That will come from the back-end via an API call in a real-life scenario.
Let’s go through the steps required:
- Add a new
buttonwith aclickevent just before thetablecomponent. We will wrap it in anarticlecontainer to be able to add more action buttons in later steps:
<article class="table-header">
  <button class="button-add-row" mat-button (click)="addRow()">Add Row</button>
</article>
<table mat-table [dataSource]="dataSource">
  <ng-container [matColumnDef]="col.key" *ngFor="let col of columnsSchema">
    <th mat-header-cell *matHeaderCellDef>
      {{ col.label }}
    </th>
    <td mat-cell *matCellDef="let element">
      <div [ngSwitch]="col.type" *ngIf="!element.isEdit">
        <div class="btn-edit" *ngSwitchCase="'isEdit'">
          <button mat-button (click)="element.isEdit = !element.isEdit">
            Edit
          </button>
        </div>
        <span *ngSwitchDefault>
          {{ element[col.key] }}
        </span>
      </div>
      <div [ngSwitch]="col.type" *ngIf="element.isEdit">
        <div class="btn-edit" *ngSwitchCase="'isEdit'">
          <button mat-button (click)="element.isEdit = !element.isEdit">Done</button>
        </div>
        <mat-form-field *ngSwitchCase="'date'" appearance="fill">
          <mat-label>Choose a date</mat-label>
          <input matInput [matDatepicker]="picker" [(ngModel)]="element[col.key]" />
          <mat-datepicker-toggle
            matSuffix
            [for]="picker"
          ></mat-datepicker-toggle>
          <mat-datepicker #picker></mat-datepicker>
        </mat-form-field>
        <mat-form-field *ngSwitchDefault>
          <input [type]="col.type" matInput [(ngModel)]="element[col.key]" />
        </mat-form-field>
      </div>
    </td>
  </ng-container>
  <tr mat-header-row *matHeaderRowDef="displayedColumns"></tr>
  <tr mat-row *matRowDef="let row; columns: displayedColumns"></tr>
</table>- Implement
addRowfunction to insert a new object into thedataSourcearray with empty values. Make sure it contains theisEditproperty that is set to true to make it editable for the user:
import { Component } from '@angular/core';

const USER_DATA = [
  {"name": "John Smith", "occupation": "Advisor", "dateOfBirth": "1984-05-05", "age": 36},
  {"name": "Muhi Masri", "occupation": "Developer", "dateOfBirth": "1992-02-02", "age": 28},
  {"name": "Peter Adams", "occupation": "HR", "dateOfBirth": "2000-01-01", "age": 20},
  {"name": "Lora Bay", "occupation": "Marketing", "dateOfBirth": "1977-03-03", "age": 43},
]

const COLUMNS_SCHEMA = [
  {
      key: "name",
      type: "text",
      label: "Full Name"
  },
  {
      key: "occupation",
      type: "text",
      label: "Occupation"
  },
  {
    key: "dateOfBirth",
    type: "date",
    label: "Date of Birth"
},
  {
      key: "age",
      type: "number",
      label: "Age"
  },
  {
    key: "isEdit",
    type: "isEdit",
    label: ""
  }
]

@Component({
  selector: 'app-root',
  templateUrl: './app.component.html',
  styleUrls: ['./app.component.scss']
})
export class AppComponent {
  displayedColumns: string[] = COLUMNS_SCHEMA.map(col => col.key);
  dataSource = USER_DATA;
  columnsSchema: any = COLUMNS_SCHEMA;

  addRow() {
    const newRow = {"name": "", "occupation": "", "dateOfBirth": "", "age": 0, isEdit: true}
    this.dataSource = [...this.dataSource, newRow];
  }
}
For Angular to trigger the OnPush change detection, we need to clone the array. That’s why we are using the spread operator on the dataSource.
In some instances, the table can be long with many rows, and adding a new entry at the bottom will require the user to scroll down every time. We can solve this matter by simply swapping the entries in the new array we just created:
this.dataSource = [newRow, ...this.dataSource];Here is a demo to how the table behaves so far:
Remove a row
As with adding a new row, all we need to do is remove the object from the sourceData array but with a slight change to the model. Let’s take a closer look:
- Deleting an object requires a unique id so let’s add a new one for every object. In a real-world scenario, ids will come from the backend:
const USER_DATA = [
  {
    id: 1,
    name: 'John Smith',
    occupation: 'Advisor',
    dateOfBirth: '1984-05-05',
    age: 36,
  },
  {
    id: 2,
    name: 'Muhi Masri',
    occupation: 'Developer',
    dateOfBirth: '1992-02-02',
    age: 28,
  },
  {
    id: 3,
    name: 'Peter Adams',
    occupation: 'HR',
    dateOfBirth: '2000-01-01',
    age: 20,
  },
  {
    id: 4,
    name: 'Lora Bay',
    occupation: 'Marketing',
    dateOfBirth: '1977-03-03',
    age: 43,
  },
];- Add a delete button with a
clickevent in every row, right next to the edit button:
<article class="table-header">
  <button class="button-add-row" mat-button (click)="addRow()">Add Row</button>
</article>
<table mat-table [dataSource]="dataSource">
  <ng-container [matColumnDef]="col.key" *ngFor="let col of columnsSchema">
    <th mat-header-cell *matHeaderCellDef>
      {{ col.label }}
    </th>
    <td mat-cell *matCellDef="let element">
      <div [ngSwitch]="col.type" *ngIf="!element.isEdit">
        <div class="btn-edit" *ngSwitchCase="'isEdit'">
          <button mat-button (click)="element.isEdit = !element.isEdit">
            Edit
          </button>
          <button
            mat-button
            class="button-remove"
            (click)="removeRow(element.id)"
          >
            Delete
          </button>
        </div>
        <span *ngSwitchDefault>
          {{ element[col.key] }}
        </span>
      </div>
      <div [ngSwitch]="col.type" *ngIf="element.isEdit">
        <div class="btn-edit" *ngSwitchCase="'isEdit'">
          <button mat-button (click)="element.isEdit = !element.isEdit">
            Done
          </button>
        </div>
        <mat-form-field
          class="form-input"
          *ngSwitchCase="'date'"
          appearance="fill"
        >
          <mat-label>Choose a date</mat-label>
          <input
            matInput
            [matDatepicker]="picker"
            [(ngModel)]="element[col.key]"
          />
          <mat-datepicker-toggle
            matSuffix
            [for]="picker"
          ></mat-datepicker-toggle>
          <mat-datepicker #picker></mat-datepicker>
        </mat-form-field>
        <mat-form-field class="form-input" *ngSwitchDefault>
          <input [type]="col.type" matInput [(ngModel)]="element[col.key]" />
        </mat-form-field>
      </div>
    </td>
  </ng-container>
  <tr mat-header-row *matHeaderRowDef="displayedColumns"></tr>
  <tr mat-row *matRowDef="let row; columns: displayedColumns"></tr>
</table>- Implement
removeRowfunction that filters thedataSourcearray to take out the object we need to remove:
import { Component } from '@angular/core';

const USER_DATA = [
  {
    id: 1,
    name: 'John Smith',
    occupation: 'Advisor',
    dateOfBirth: '1984-05-05',
    age: 36,
  },
  {
    id: 2,
    name: 'Muhi Masri',
    occupation: 'Developer',
    dateOfBirth: '1992-02-02',
    age: 28,
  },
  {
    id: 3,
    name: 'Peter Adams',
    occupation: 'HR',
    dateOfBirth: '2000-01-01',
    age: 20,
  },
  {
    id: 4,
    name: 'Lora Bay',
    occupation: 'Marketing',
    dateOfBirth: '1977-03-03',
    age: 43,
  },
];

const COLUMNS_SCHEMA = [
  {
    key: 'name',
    type: 'text',
    label: 'Full Name',
  },
  {
    key: 'occupation',
    type: 'text',
    label: 'Occupation',
  },
  {
    key: 'dateOfBirth',
    type: 'date',
    label: 'Date of Birth',
  },
  {
    key: 'age',
    type: 'number',
    label: 'Age',
  },
  {
    key: 'isEdit',
    type: 'isEdit',
    label: '',
  },
];

@Component({
  selector: 'app-root',
  templateUrl: './app.component.html',
  styleUrls: ['./app.component.scss'],
})
export class AppComponent {
  displayedColumns: string[] = COLUMNS_SCHEMA.map((col) => col.key);
  dataSource = USER_DATA;
  columnsSchema: any = COLUMNS_SCHEMA;

  addRow() {
    const newRow = {
      id: Date.now(),
      name: '',
      occupation: '',
      dateOfBirth: '',
      age: 0,
      isEdit: true,
    };
    this.dataSource = [newRow, ...this.dataSource];
  }

  removeRow(id: number) {
    this.dataSource = this.dataSource.filter((u) => u.id !== id);
  }
}
We also modified the addRow function to generate a random id so that the remove works on new rows.
Here is a demo of the remove functionality we just did:
Remove multiple rows
This section will introduce a new feature to support removing multiple rows. That requires a slight change to the model to keep track of the selected rows. Let’s go through the necessary steps:
- Add a new
isSelectedcolumn to theCOLUMNS_SCHEMA. That will help us determine which rows are selected:
const COLUMNS_SCHEMA = [
  {
    key: 'isSelected',
    type: 'isSelected',
    label: '',
  },
  {
    key: 'name',
    type: 'text',
    label: 'Full Name',
  },
  {
    key: 'occupation',
    type: 'text',
    label: 'Occupation',
  },
  {
    key: 'dateOfBirth',
    type: 'date',
    label: 'Date of Birth',
  },
  {
    key: 'age',
    type: 'number',
    label: 'Age',
  },
  {
    key: 'isEdit',
    type: 'isEdit',
    label: '',
  }
];-
Add a checkbox element as a new column only within the none-edit mode section because we don’t need it to appear while editing the row
-
Define a
changeevent to insert theisSelectedproperty into the row dynamically.$event.checkeddetermines the value(true or false)
<div [ngSwitch]="col.type" *ngIf="!element.isEdit">
  <ng-container *ngSwitchCase="'isSelected'">
    <mat-checkbox
      (change)="element.isSelected = $event.checked"
      [checked]="element.isSelected">
    </mat-checkbox>
  </ng-container>
  <div class="btn-edit" *ngSwitchCase="'isEdit'">
    <button mat-button (click)="element.isEdit = !element.isEdit">Edit</button>
    <button mat-button class="button-remove" (click)="removeRow(element.id)">
      Delete
    </button>
  </div>
  <span *ngSwitchDefault>
    {{ element[col.key] }}
  </span>
</div>- Add a new remove button with a
clickevent. Let’s place it right next to the add button created earlier:
<article class="table-header">
  <button class="button-remove-rows" mat-button (click)="removeSelectedRows()">
    Remove Rows
  </button>
  <button class="button-add-row" mat-button (click)="addRow()">Add Row</button>
</article>- Create a new
removeSelectedRowsfunction that filters and returns the non-selected rows from thesourceDataarray:
removeSelectedRows() {
  this.dataSource = this.dataSource.filter((u: any) => !u.isSelected);
}
Let’s clarify a bit more; when the user selects a row, the object will attach isSelected: true to the object as follows:
{id: 1, "name": "John Smith", "occupation": "Advisor", "dateOfBirth": "1984-05-05", "age": 36, isSelected: true}Then we filter the dataSource by isSelected values to remove them and return a new array.
Let’s demonstrate what we have so far:
What we did above does not incorporate “select/unselect all” option because the checkbox was only added to the data row.
To support this feature, we can add a switch statement in the header cell to check for isSelected and display a checkbox instead of a label.
<th mat-header-cell *matHeaderCellDef [ngSwitch]="col.key">
  <span *ngSwitchCase="'isSelected'">
    <mat-checkbox></mat-checkbox>
  </span>
  <span *ngSwitchDefault>{{ col.label }}</span>
</th>
Then we have to define three functions:
- isAllSelected - return whether every row is selected
- isAnySelected - return if any row is selected
- selectAll - select/unselect all rows
  isAllSelected() {
    return this.dataSource.every((item: any) => item.isSelected);
  }

  isAnySelected() {
    return this.dataSource.some((item: any) => item.isSelected);
  }

  selectAll(event) {
    this.dataSource = this.dataSource.map((item: any) => ({
      ...item,
      isSelected: event.checked,
    }));
  }
The first two functions will determine whether or not the checkbox should have a “checked” or “indeterminate” icon. If all are selected, it’s a standard check icon, but if one or a few are selected, then it’s indeterminate. Otherwise, it’s unchecked.
<th mat-header-cell *matHeaderCellDef [ngSwitch]="col.key">
  <span *ngSwitchCase="'isSelected'">
    <mat-checkbox
      (change)="selectAll($event)"
      [checked]="isAllSelected()"
      [indeterminate]="!isAllSelected() && isAnySelected()">
    </mat-checkbox>
  </span>
  <span *ngSwitchDefault>{{ col.label }}</span>
</th>
Confirmation dialog
If the remove rows function triggers an API call to delete selected rows, it’s good to add a confirmation dialog before proceeding. That requires a few simple steps:
- Create a new
ConfirmDialogcomponent. We can use the CLI command:
ng generate component confirm-dialog- Add the required template for the confirmation dialog. In our case, it’s just a simple confirm/cancel dialog:
<h1 mat-dialog-title>Are you sure you want to delete?</h1>
<div mat-dialog-actions>
    <button mat-button [mat-dialog-close]>Cancel</button>
    <button class="delete-button" mat-button [mat-dialog-close]="true">Delete</button>
</div>- In
app.component.ts, subscribe to theafterClosedevent and remove all the selected rows if the action was “Yes” otherwise just close the dialog:
 removeSelectedRows() {
    this.dialog
      .open(ConfirmDialogComponent)
      .afterClosed()
      .subscribe((confirm) => {
        if (confirm) {
          this.dataSource = this.dataSource.filter((u: any) => !u.isSelected);
        }
      });
  }
We don’t need to add any code to the confirm-dialog.component.ts file because the cancel/delete buttons in the confirm dialog template contain a mat-dialog-close directive that automatically closes the dialog for us, and that’s all that we need for now.
Let’s take a quick look at what we have so far:
Below is the complete HTML template and component class code:
<article class="table-header">
  <button class="button-remove-rows" mat-button (click)="removeSelectedRows()">
    Remove Rows
  </button>
  <button class="button-add-row" mat-button (click)="addRow()">Add Row</button>
</article>
<table mat-table [dataSource]="dataSource">
  <ng-container [matColumnDef]="col.key" *ngFor="let col of columnsSchema">
  <th mat-header-cell *matHeaderCellDef [ngSwitch]="col.key">
  <span *ngSwitchCase="'isSelected'">
    <mat-checkbox
      (change)="selectAll($event)"
      [checked]="isAllSelected()"
      [indeterminate]="!isAllSelected() && isAnySelected()">
    </mat-checkbox>
  </span>
  <span *ngSwitchDefault>{{ col.label }}</span>
</th>
    <td mat-cell *matCellDef="let element">
      <div [ngSwitch]="col.type" *ngIf="!element.isEdit">
        <ng-container *ngSwitchCase="'isSelected'">
        <mat-checkbox
        (change)="element.isSelected = $event.checked"
        [checked]="element.isSelected">
      </mat-checkbox>
        </ng-container>
        <div class="btn-edit" *ngSwitchCase="'isEdit'">
          <button mat-button (click)="element.isEdit = !element.isEdit">
            Edit
          </button>
          <button
            mat-button
            class="button-remove"
            (click)="removeRow(element.id)"
          >
            Delete
          </button>
        </div>
        <span *ngSwitchDefault>
          {{ element[col.key] }}
        </span>
      </div>
      <div [ngSwitch]="col.type" *ngIf="element.isEdit">
        <div *ngSwitchCase="'isSelected'"></div>
        <div class="btn-edit" *ngSwitchCase="'isEdit'">
          <button mat-button (click)="element.isEdit = !element.isEdit">
            Done
          </button>
        </div>
        <mat-form-field
          class="form-input"
          *ngSwitchCase="'date'"
          appearance="fill"
        >
          <mat-label>Choose a date</mat-label>
          <input
            matInput
            [matDatepicker]="picker"
            [(ngModel)]="element[col.key]"
          />
          <mat-datepicker-toggle
            matSuffix
            [for]="picker"
          ></mat-datepicker-toggle>
          <mat-datepicker #picker></mat-datepicker>
        </mat-form-field>
        <mat-form-field class="form-input" *ngSwitchDefault>
          <input [type]="col.type" matInput [(ngModel)]="element[col.key]" />
        </mat-form-field>
      </div>
    </td>
  </ng-container>
  <tr mat-header-row *matHeaderRowDef="displayedColumns"></tr>
  <tr mat-row *matRowDef="let row; columns: displayedColumns"></tr>
</table>
import { Component } from '@angular/core';
import { MatDialog } from '@angular/material/dialog';
import { ConfirmDialogComponent } from './confirm-dialog/confirm-dialog.component';
const USER_DATA = [
{
id: 1,
name: 'John Smith',
occupation: 'Advisor',
dateOfBirth: '1984-05-05',
age: 36,
},
{
id: 2,
name: 'Muhi Masri',
occupation: 'Developer',
dateOfBirth: '1992-02-02',
age: 28,
},
{
id: 3,
name: 'Peter Adams',
occupation: 'HR',
dateOfBirth: '2000-01-01',
age: 20,
},
{
id: 4,
name: 'Lora Bay',
occupation: 'Marketing',
dateOfBirth: '1977-03-03',
age: 43,
},
];
const COLUMNS_SCHEMA = [
{
key: 'isSelected',
type: 'isSelected',
label: '',
},
{
key: 'name',
type: 'text',
label: 'Full Name',
},
{
key: 'occupation',
type: 'text',
label: 'Occupation',
},
{
key: 'dateOfBirth',
type: 'date',
label: 'Date of Birth',
},
{
key: 'age',
type: 'number',
label: 'Age',
},
{
key: 'isEdit',
type: 'isEdit',
label: '',
},
];
@Component({
selector: 'app-root',
templateUrl: './app.component.html',
styleUrls: ['./app.component.scss'],
})
export class AppComponent {
displayedColumns: string[] = COLUMNS_SCHEMA.map((col) => col.key);
dataSource = USER_DATA;
columnsSchema: any = COLUMNS_SCHEMA;
constructor(public dialog: MatDialog) {}
addRow() {
const newRow = {
id: Date.now(),
name: '',
occupation: '',
dateOfBirth: '',
age: 0,
isEdit: true,
};
this.dataSource = [newRow, ...this.dataSource];
}
removeRow(id: number) {
this.dataSource = this.dataSource.filter((u) => u.id !== id);
}
removeSelectedRows() {
this.dialog
.open(ConfirmDialogComponent)
.afterClosed()
.subscribe((confirm) => {
if (confirm) {
this.dataSource = this.dataSource.filter((u: any) => !u.isSelected);
}
});
}
isAllSelected() {
return this.dataSource.every((item: any) => item.isSelected);
}
isAnySelected() {
return this.dataSource.some((item: any) => item.isSelected);
}
selectAll(event) {
this.dataSource = this.dataSource.map((item: any) => ({
...item,
isSelected: event.checked,
}));
}
}Summary
If you made it to this section, pat yourself on the back! You just learned how to:
- Add and remove table rows with Angular Material
- Enable checkbox column for multi-row selection
- Add confirmation dialog before removing rows
You can access the complete repository here.
Bye for now 👋


